
Posted:
*TUT*
Making Banners Using
Paint Shop Pro
Making Banners Using
Paint Shop Pro
Step 1:
open your psp(i am using psp8 for this tut but any version would be doing:)
Goto File>New or simply press ctrl+n
This window will open:
Use the settings above along with the dimensions(as per new IF banner size that is 728 X 90 pixels).
After pressing Ok a new image will open:
Step 2:
Press ctrl+o or goto File again and click open,a new box will open now.Select the destination folder(where you saved all your pictures to be used in the banner)>click on the picture you want to use first and press open button on right side.
Your image will open.
Click on your image and press shift+s or simply goto Image button on top>Resize
This box will open now:
Use the setting above and make sure you are resizing it as pixel and that the aspect ratio box is unchecked down.Once you are done click ok button and your image automatically would resized
(becomes small)as per the given dimensions.
Step 3:
Right click and copy your newly resized image and then click on the transparent banner image you had opened first. Right click there and paste>paste as new layer. You will find that small picture inside your banner img.Select the DEFORM tool from your toolbar(the one which is encirled in the snapshot down on left hand size)and position your small picture(here used is anandi-jadish one from balika vadhu).
Step 4:
Repeat step 2 for opening another image and resize it again.copy it and paste it as new layer again in your banner img.Position it by using the deform tool the way you did in step 3.
Here make sure the second image overlaps a little bit with the first image and that the third layer in on top of the second one. Then select eraser tool from your tool box on left:
Now use these settings on top for the eraser tool:
go back to your banner and drag the eraser button by it clicking on the overlapping line where the second image is on top of the first one.
you will see that part of your second image mix with the first image.This is known as blending.
Step 5:
Repeat step 4 again and again till all the pictures you want in your banner are included, that is repeat from beggining with opening a new image,resizing it,pasting it in the banner as new layer,position each pictures using deform tool,make sure they overlap with the image pasted before them and that each layer is on top of each other.Use the eraser tool to blend all the pictures the same way you did in step 4.
Step 6:
If you think you have inserted many images in your banner that you wanted to use,you can add desired TEXT in your banner.You can add brush strokes,use different textures etc to make you banner look more effective. you can find all the tutz to various simple effects here.😛 and also you can learn blending in a proper way from there Itself along with using different features available in ps or psp:)
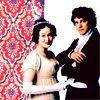
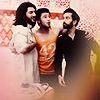
example of simple effective banner:
Step 7:
Once you think you are done with everything.You right click and press copy merged than paste it as new image.Save that new image by going to file>save as. Save it as either jpeg or png,or the ones that give the better quality:)
Goto File>New or simply press ctrl+n
This window will open:
Use the settings above along with the dimensions(as per new IF banner size that is 728 X 90 pixels).
After pressing Ok a new image will open:
*
Step 2:
Press ctrl+o or goto File again and click open,a new box will open now.Select the destination folder(where you saved all your pictures to be used in the banner)>click on the picture you want to use first and press open button on right side.
Your image will open.
Click on your image and press shift+s or simply goto Image button on top>Resize
This box will open now:
Use the setting above and make sure you are resizing it as pixel and that the aspect ratio box is unchecked down.Once you are done click ok button and your image automatically would resized
(becomes small)as per the given dimensions.
*
Step 3:
Right click and copy your newly resized image and then click on the transparent banner image you had opened first. Right click there and paste>paste as new layer. You will find that small picture inside your banner img.Select the DEFORM tool from your toolbar(the one which is encirled in the snapshot down on left hand size)and position your small picture(here used is anandi-jadish one from balika vadhu).
*
Step 4:
Repeat step 2 for opening another image and resize it again.copy it and paste it as new layer again in your banner img.Position it by using the deform tool the way you did in step 3.
Here make sure the second image overlaps a little bit with the first image and that the third layer in on top of the second one. Then select eraser tool from your tool box on left:
Now use these settings on top for the eraser tool:
go back to your banner and drag the eraser button by it clicking on the overlapping line where the second image is on top of the first one.
you will see that part of your second image mix with the first image.This is known as blending.
*
Step 5:
Repeat step 4 again and again till all the pictures you want in your banner are included, that is repeat from beggining with opening a new image,resizing it,pasting it in the banner as new layer,position each pictures using deform tool,make sure they overlap with the image pasted before them and that each layer is on top of each other.Use the eraser tool to blend all the pictures the same way you did in step 4.
*
Step 6:
If you think you have inserted many images in your banner that you wanted to use,you can add desired TEXT in your banner.You can add brush strokes,use different textures etc to make you banner look more effective. you can find all the tutz to various simple effects here.😛 and also you can learn blending in a proper way from there Itself along with using different features available in ps or psp:)
example of simple effective banner:
Step 7:
Once you think you are done with everything.You right click and press copy merged than paste it as new image.Save that new image by going to file>save as. Save it as either jpeg or png,or the ones that give the better quality:)
---
high apologies if you faced confugia anywhere,made it in extreme rush.
sorry know could have posted the same tut in the tutorials thread but since it was required for now posted it here. Hope this tut was simple and easy to follow and it helped you.
If you have any problem or any doubt please post them here or you can pm them.
love,
aditi


comment:
p_commentcount