


Posted:
Hi Friends,
Recently the Development-Group has noticed that after my article Posting Pictures on India-Forums. , everyone has started putting huge pics at signatures.
There are some rules for posting pics at sig. Although sig is not the place to post pics.
Limitations:
- Avtaar: Maximum 96*96 only.
- Sig Pics: Maximum Width 500px & Maximum Height 150px only.
Afterall these limitations are for your benefit and faster page loading for dial-up users, i.e., Better user Experience.
Here is a small tutorial where you learn how to resize ur pics.
Note: If your pictures are not resized, they shall be removed by the forum moderators if it exceeds the Forum Pic Size Limitation.
Thanks to https://www.somewhere-in-time.net/tutorial/irfanview/ for the article.
RESIZING LARGE IMAGES USING IRFANVIEW
If you do not have Irfranview, please download from the link below and install on your PC.
iview395.exe --------> https://www.somewhere-in-time.net/tutorial/irfanview/iview395 .exe
857 k
For the sake of this tutorial, please make a folder on your DESKTOP
Name it: pictures
folder for 'pictures'
https://www.somewhere-in-time.net/tutorial/irfanview/iview395 .exe

Put the photo you want to resize into the "pictures" folder on your desktop. I am using an image called SceneWater.jpg. You may download it from here if you'd like to use the same photo while practicing this resizing exercise.
Double click the Irfanview icon on your desktop to open the photo program. The icon looks like this:

Irfanview Icon
STEP ONE
FILE / OPEN
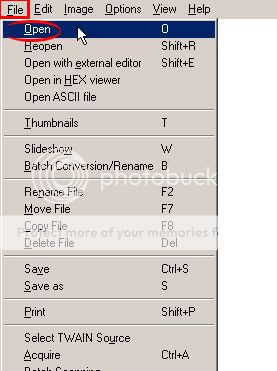
With your mouse, left click on FILE on the menu bar, continue holding your left button down and drag your cursor down to OPEN
STEP TWO
OPEN .JPG
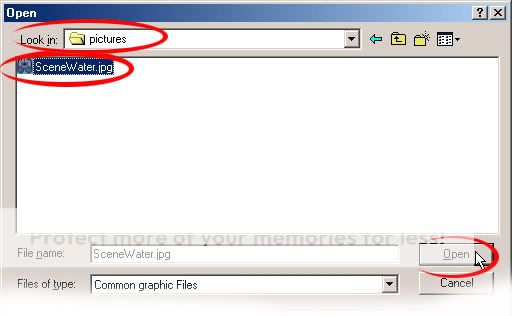
A window (as above) will open. Go to your "pictures" folder on your desktop and you should see the image you're going to resize .. in the example above is the SceneWater.jpg. Left click on it once to select it, then click the OPEN button.
STEP THREE
IMAGE RESIZE/RESAMPLE
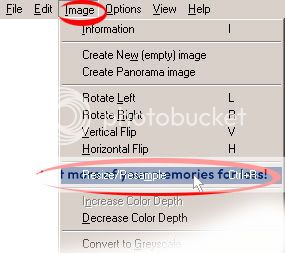
To determine the size of your image, left click on IMAGE on the menu bar and drag your mouse down to RESIZE/RESAMPLE
STEP FOUR
ORIGINAL SIZES
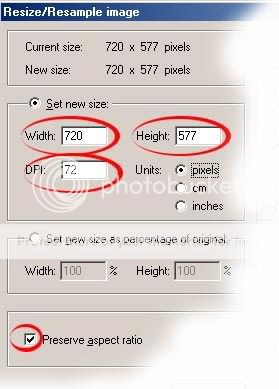
If using the image SceneWater.jpg, you will see the width is 720 pixels, the height is 577 pixels and the DPI (dots per inch) is 72. Too big!! That translates into 10 x 8 inches (there are 72 pixels per inch). We need to reduce the physical size of the image. The 72 dpi is fine. Make sure the PRESERVE ASPECT RATIO box has a check mark in it.
STEP FIVE
NEW SIZES
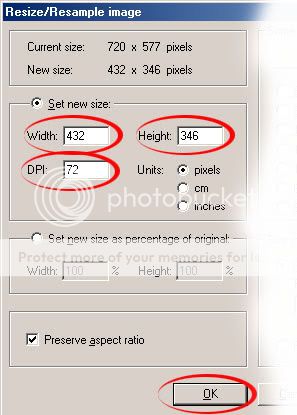
Erase (select and delete) the 720 in the WIDTH box and type 432. 432 translates to 6 inches. (remember -- 72 pixels = 1 inch). Because you have the PRESERVE ASPECT RATIO checked, the width will automatically change to 346 (4.8 inches). If you have any number other than 72 in the DPI window, (e.g. 300, 150) change it now by erasing your number and typing 72. Click OK.
STEP SIX
SAVE AS
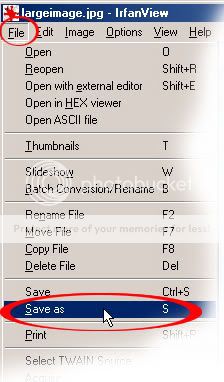
Now you need to 'save' your image with its new size. On the menu bar, left click on FILE, drag your mouse down to SAVE AS. (If you simply click SAVE, you will override your original image, which you might not want to do. I always keep my original images.)
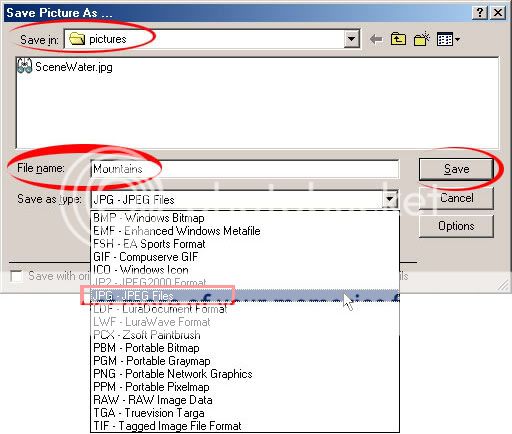
A window will open. Make sure you're saving your new image in your 'pictures' folder on your desktop so you don't lose it. Browse to your desktop/pictures if it doesn't automatically come up in the LOOK IN: location bar at the top of this window. Give your new image a new name -- I have called it Mountains. Type this new name in the FILE NAME: window. SAVE AS TYPE: drop menu down and drag your mouse down to JPG - JPEG Files to select the .jpg option. Click the SAVE button.
You now have a new image, called Mountains.jpg, 432 x 346 pixels (6" x 4.8") at 72 dpi. A much more manageable image size to send your friends via email.
If you'd like to take this one step further, here are instructions for CROPPING your image.
CROP SELECTION
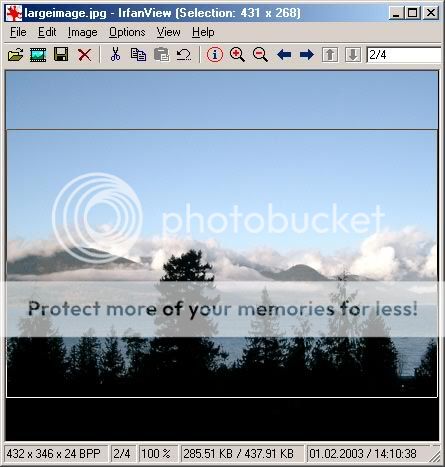
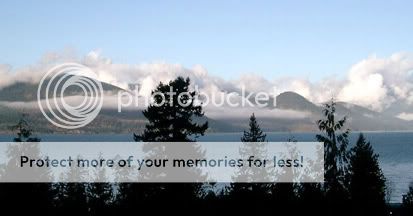
With your newly resized image open, LEFT click on the image to determine the top left corner of where you'd like to begin your cropping and holding your left mouse button down, drag over your image to the right and in a downward motion till you 'select' the area you'd like to KEEP. If it doesn't work right the first time, left click on it again, and drag again until you're happy with the area you'd like to save. I've selected the 'main' part of the photo above and am eliminating some of the sky and some of the black section at the bottom of the image.
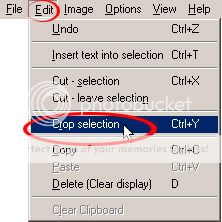
EDIT / CROP
Now go to EDIT, drag your mouse down to Crop selection and let go of your mouse button.
FINAL PHOTO, CROPPED AND RESIZED
Our newly cropped and resized photo.
You need to save it again because you have made changes to the image since your last save. So click on FILE then drag your mouse down to SAVE (name will remain as Mountains.jpg), click SAVE.
****************Courtesy of Sunny (Humm)****************


comment:
p_commentcount